Set up your schedule, define your pricing, and organize your lesson links.
1. Start from the Classes tab
Navigate to the Classes tab in the sidebar. Since this is your first time here, you’ll see a "No classes yet" message.
Click the Create your first class button to open the setup window.

Note: You can also click the + New Class button from your main Dashboard at any time.
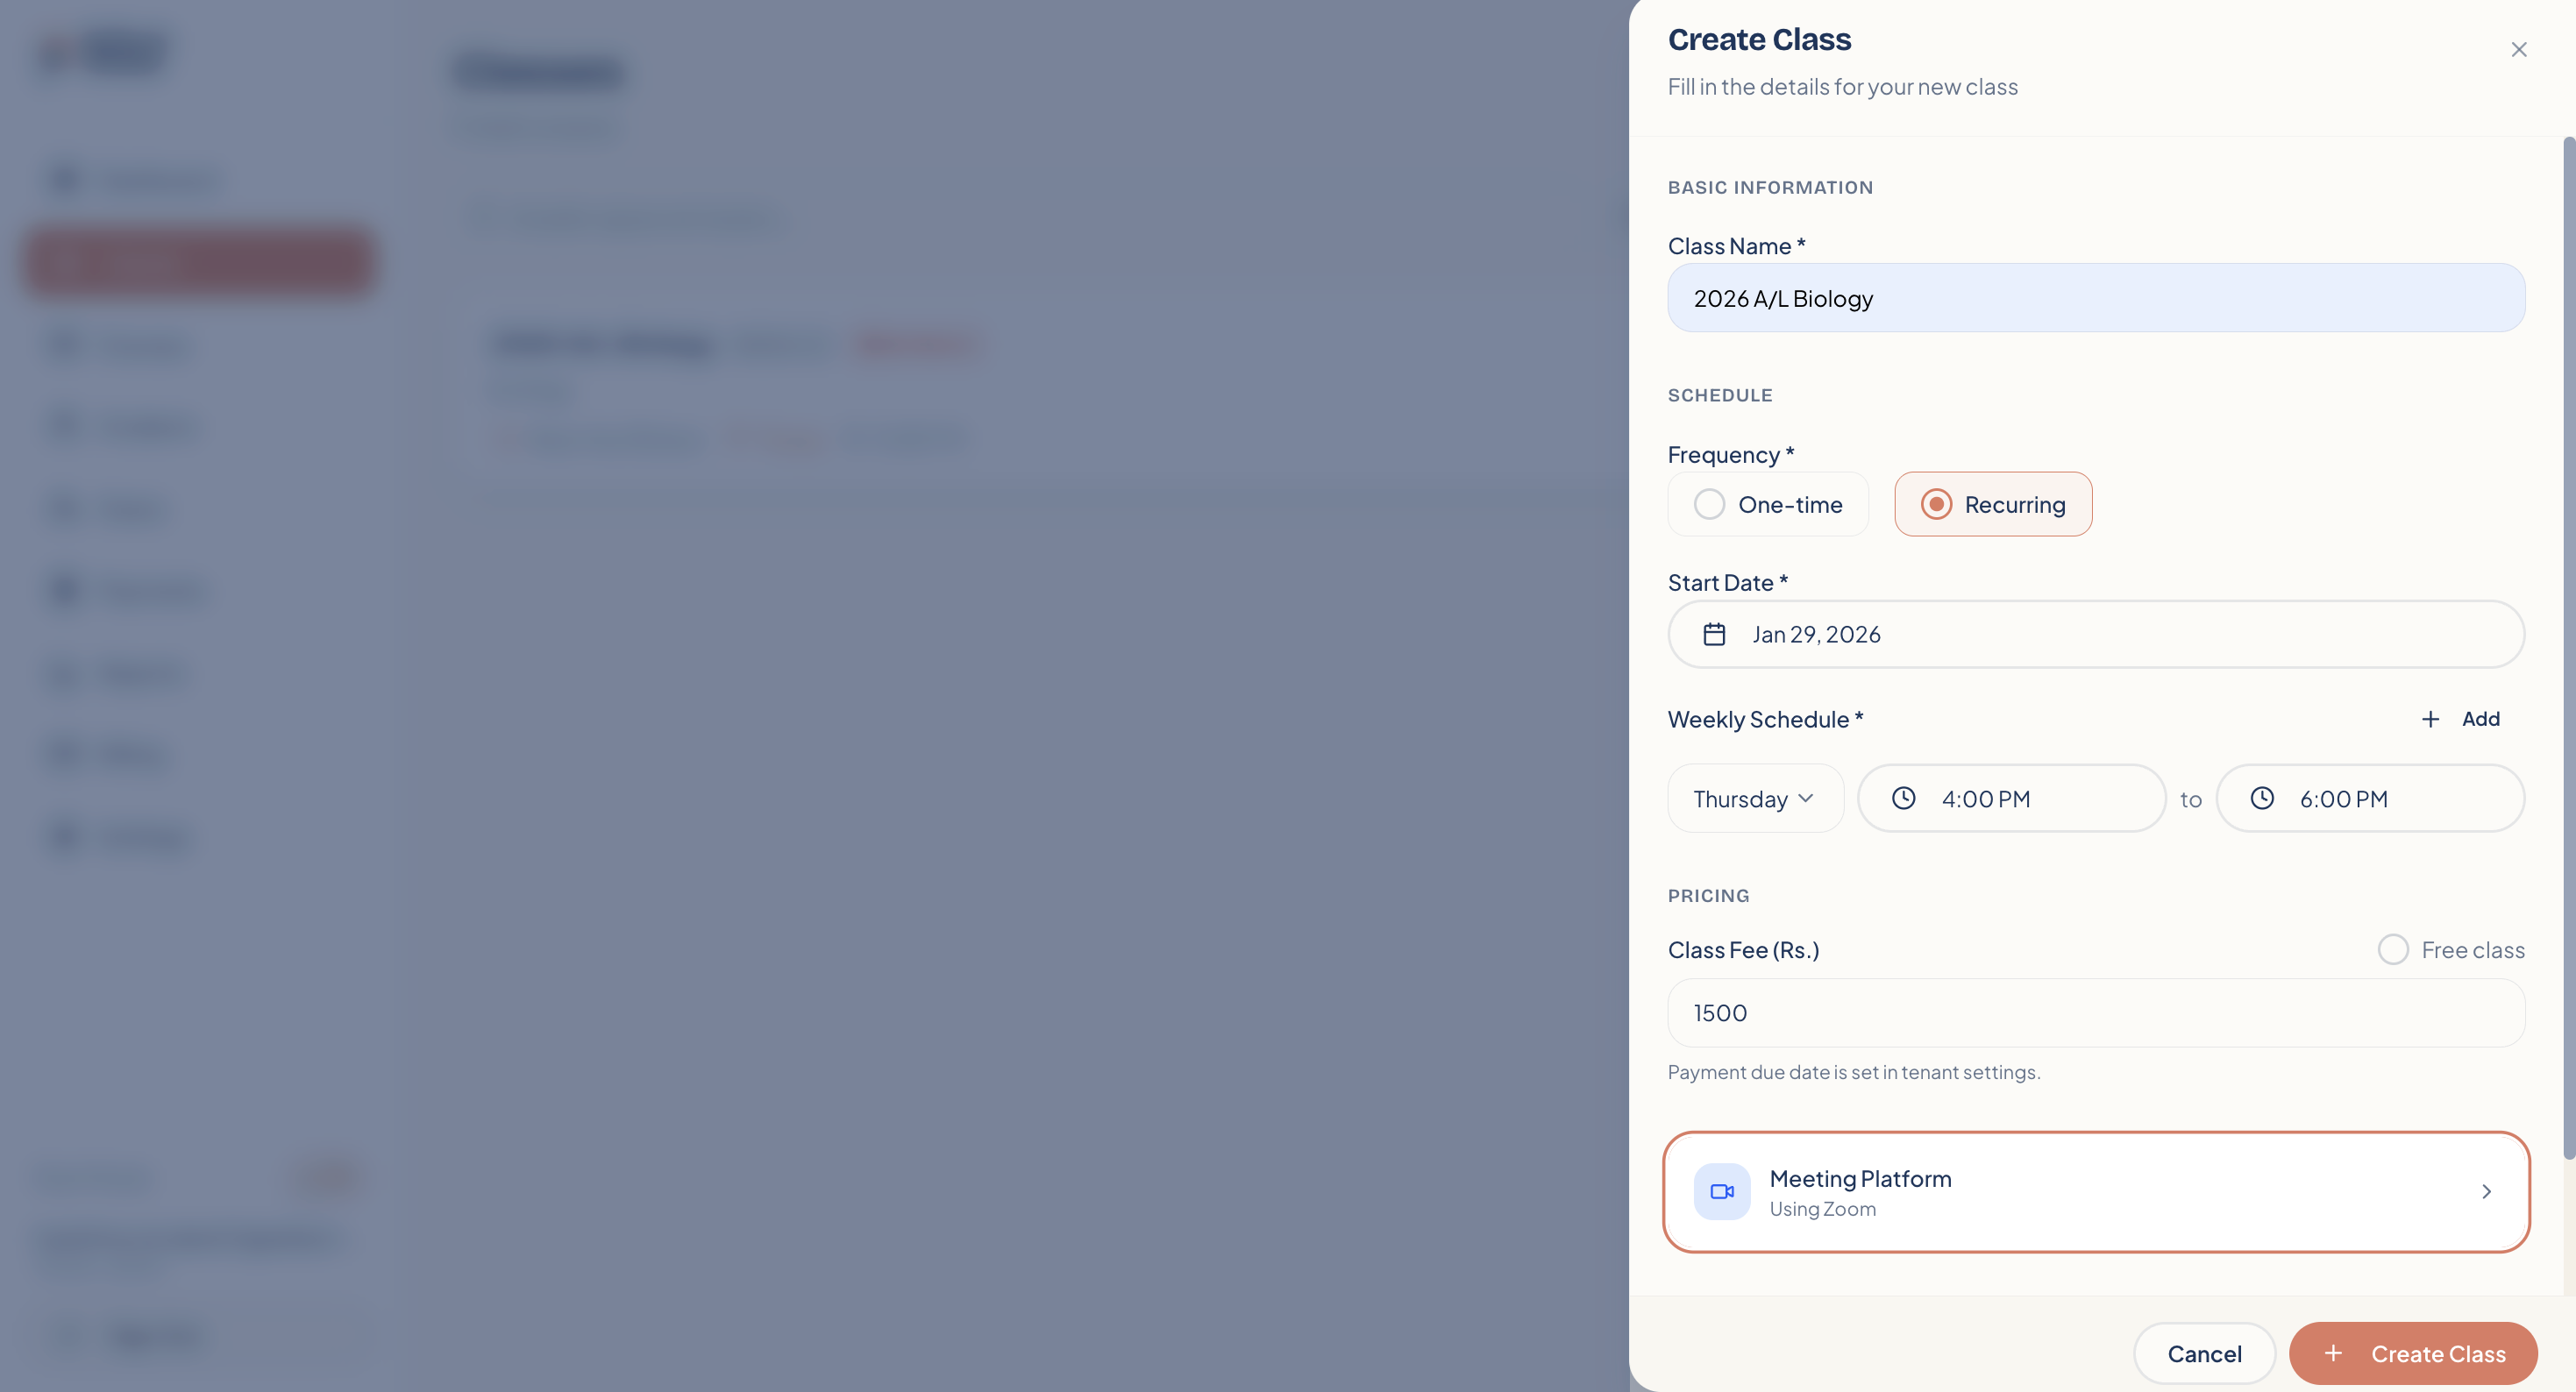
2. Fill in the basic details
First, let's define the "who, when, and how much" of your class.
Class Name: Give your class a clear, descriptive title (e.g., "Advanced Mathematics").
Schedule:
Select One-time for single workshops.
Select Recurring for ongoing courses (e.g., every Monday and Wednesday).
Weekly Schedule: If recurring, define the specific days and start/end times.
Pricing: Enter the Class Fee (in your local currency) or toggle on Free class if there is no cost.
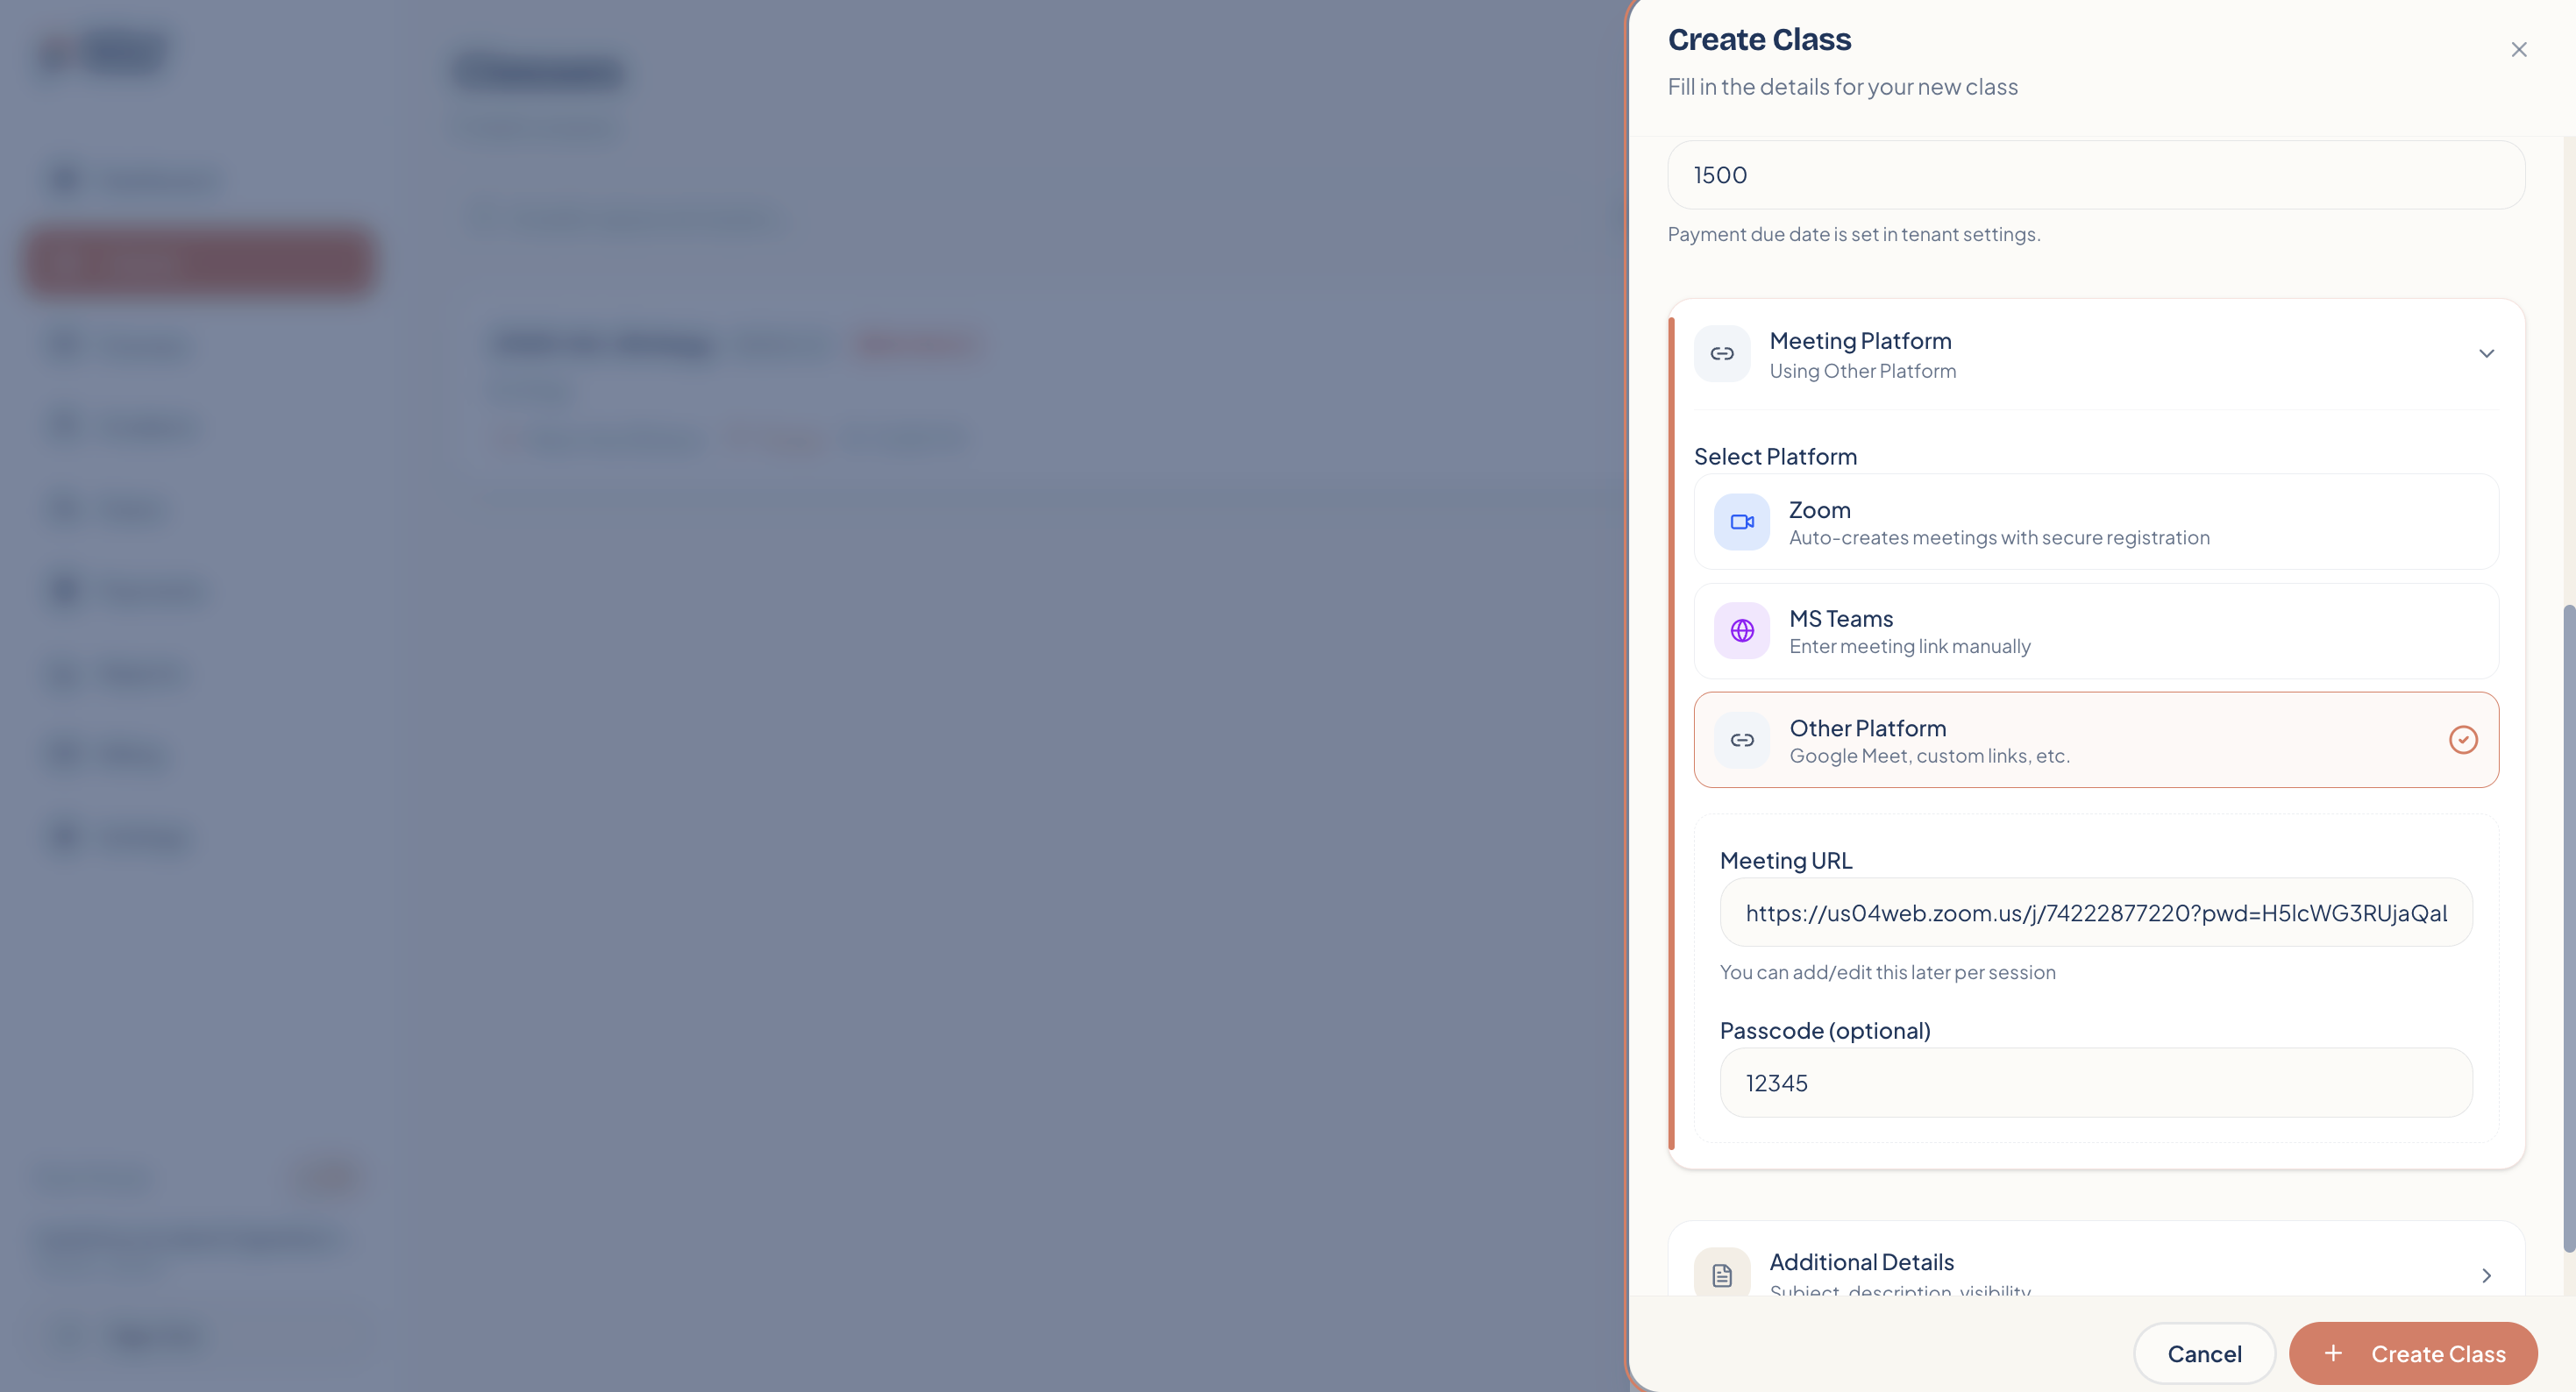
3. Set up the meeting platform
Next, tell students where the class will take place. Scroll down to the Meeting Platform section. You have two options depending on the video tool you use.
Option A: Zoom (Direct Integration) If you use Zoom, you can connect your account to generate links automatically and access advanced controls.
Note: First, ensure your Zoom account is connected by navigating to Settings > Profile > Connected Accounts.
Once selected, you will see two additional options:
Secure Class: Toggle this on to prevent students from sharing the class link with others, ensuring only enrolled students can join.
Recordings: Toggle this on if you want the session to be recorded automatically for later viewing.
Option B: Other Platforms (Google Meet, MS Teams, etc.) For any other video conferencing tool, select Other Platform.
Meeting URL: Paste your specific meeting link here (e.g., from Google Calendar).
Passcode (Optional): Add a password if your meeting requires one.
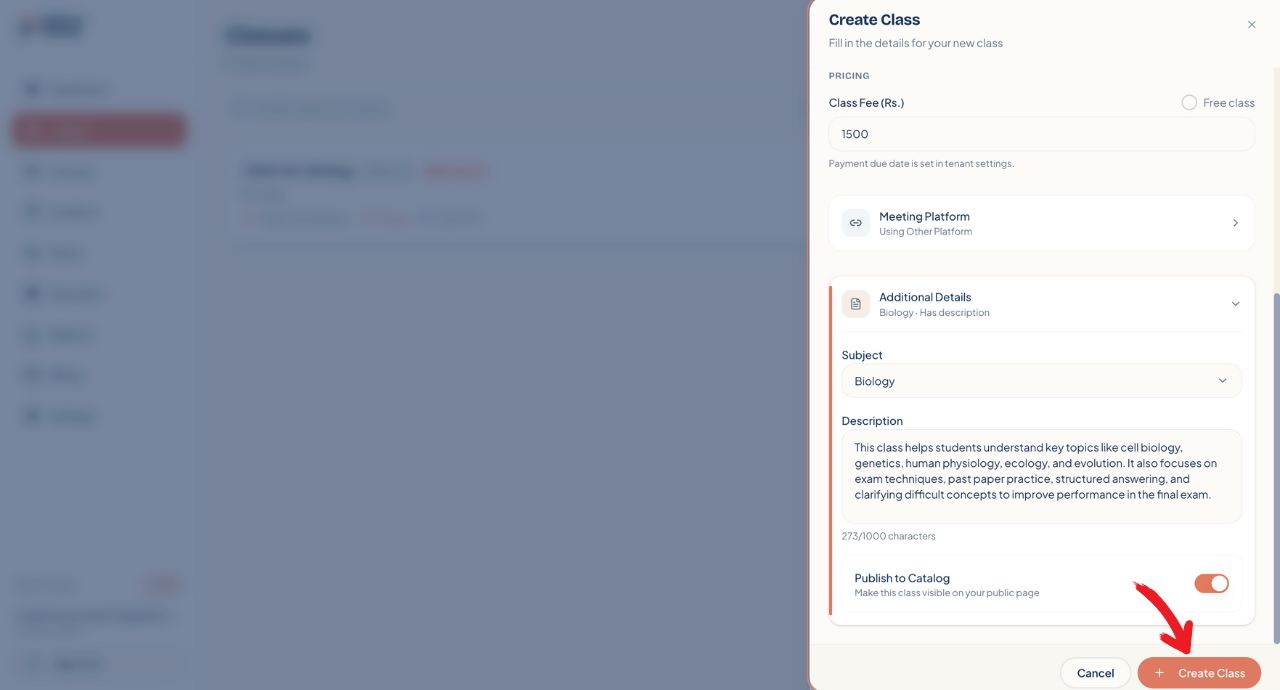
4. Add details and publish
Finally, open the Additional Details section to categorize your class.
Subject: Select the subject this class belongs to (this helps with reporting).
Description: Write a brief summary of what students will learn.
Publish to Catalog: Toggle this ON if you want this class to be visible on your public classes catalog for anyone to purchase.
Once you are satisfied, click Create Class.
5. You are ready to teach!
Your class is now live! You will see it listed in your Classes dashboard. From here, you can easily copy the link to share with students, view the class details, or manage enrollments.
